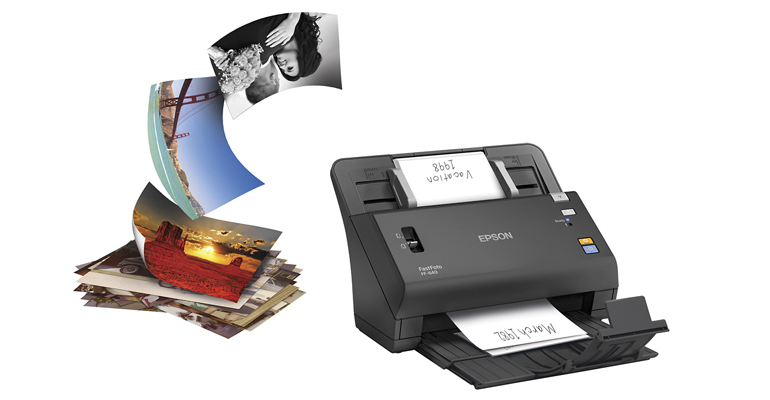
It’s probably impossible to approximate the number of photo prints packed away in homes throughout Canada, and with digital photography already widespread, Epson is trying to bridge the gap to digitize those prints quickly.
The FastFoto FF-640 borrows various elements of fast document scanners, only it is designed to speed through prints and send digital versions in bunches to a Windows PC or Mac quickly. That’s not to say documents can’t roll through it — they definitely can — but it’s the photos that are the primary reason to even consider this unit.
Rapid scanning
The basics are this: the FastFoto FF-640 can scan up to 30 images at a rate of one per second, saving them as JPEGs. Images of 5 x 7 or smaller can fit within the adjustable sliders, whereas larger prints would have to be scanned individually. One caveat to the speed, however, is in the resolution. Selecting 600dpi over 300dpi more than doubles the scanning time, but produces larger images (including larger file sizes) that provide more flexibility for cropping or photo-editing. I opted to always stick to the 600dpi.
A set of 30 4 x 6 prints took about three minutes and change to scan at 600dpi and save them all to the connected computer. That is a total time from loading up the scanner’s tray to seeing the last file appear in the sub-folder on the computer screen. I was able to scan 30 images in about 30 seconds at 300dpi, not including the added time for those images to appear on the computer.
Despite using the old method of a sheet-fed system that rolls photos through, Epson managed to do it in a way that has no adverse effects on the prints themselves. I came away a little surprised there wasn’t a single incident of jamming or off-centred scanning after putting over 1,500 prints through it. Not to say it couldn’t happen — prints stuck together or bent corners could cause a jam.

The FastFoto software makes a big difference in smoothing out the process and avoiding an organizing fiasco. Though it’s not distinctly noted, the best way to scan images is in related batches, so prints from a specific event or the same year are the best way to go. Typing in the year, month and a description of the batch about to be scanned attaches metadata to each print scanned in that batch. Adding more isn’t a problem because the software doesn’t reset to a new set of metadata until you click to end the scanning session. It’s simple and brilliant.
Operation is also pretty painless. Pressing the blue button at the front starts the scanner, and the prints run through. The scanned files appear on the computer, but don’t pop up the actual images. They have to be opened manually, though I didn’t find that a major drawback.
One reason why is because scanned images can automatically import to Photos on a Mac. Alternatively, they can be previewed with a simple spacebar through the Finder. With Windows, the options are more varied.
Rolling along
A unique extra here is double-sided scanning that also captures handwritten notes. This was really important, especially for older photos my parents had, where many had something written in the back.
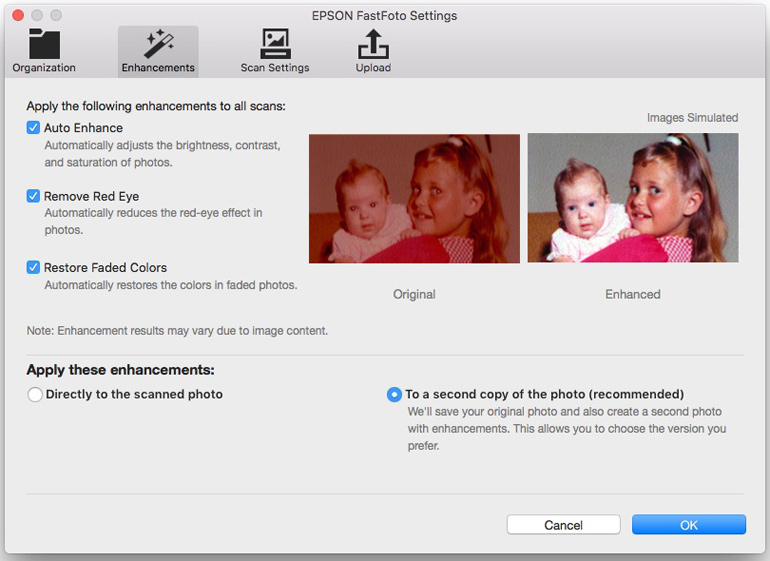
Automatic image enhancement is also another option, and Epson wisely made it so that the original and edited version save to the computer. I wasn’t overly impressed with the color correction and exposure compensation the software produced. It’s a fine line when dealing with older prints, especially vintage ones. Slight tweaks with better editing tools can make a big difference, and in my case, I let my dad adjust things using the sliders in Photos to his liking for my parents’ old prints.
The Restore feature in the FastFoto software was better suited to images that were overexposed, underexposed or faded. I could get better results by spending more time with them in an advanced photo-editing program, but the general result wasn’t too bad.
It’s unfortunate Epson didn’t include Wi-Fi in the unit for wireless connectivity because it adds a further step to getting scanned prints onto mobile devices. Sure, you can always post a throwback scan onto social media through a web browser, but given the propensity for applying filters and effects through third-party mobile apps, it is one of the trade-offs for getting through batches faster.
Then there’s the maintenance factor. Any scanner dealing with large numbers will need some TLC. While wear and tear was literally non-existent in my tests, some stewardship is required to keep it that way. Epson suggests wiping dust off prints first (this is one reason why there’s a microfibre cloth is included in the box) before running them through.
Epson says cleaning the scanner’s rollers is the only thing it really needs to avoid any dust particles or white lines showing up on scanned prints. The glass scanning surfaces also need to be dusted occasionally.
Paying a price
There are two key metrics that stood out throughout the testing process. First, is the price. At $900, it’s an expensive proposition. The second is tied to the first, which is, what to do with the unit after all the prints have been scanned?
That it can scan documents effectively certainly helps stretch it out to ancillary use cases, and I can see a high likelihood that family and friends would ask to have their prints scanned too. While I’m not one to usually suggest a business model in a review, this scanner does present some opportunity that way.
Flatbed scanners have long been the best method to digitize prints, except doing them in bulk would take eons by comparison. The FastFoto FF-640 isn’t for scanning the odd photo here and there — especially with the cost of entry.


