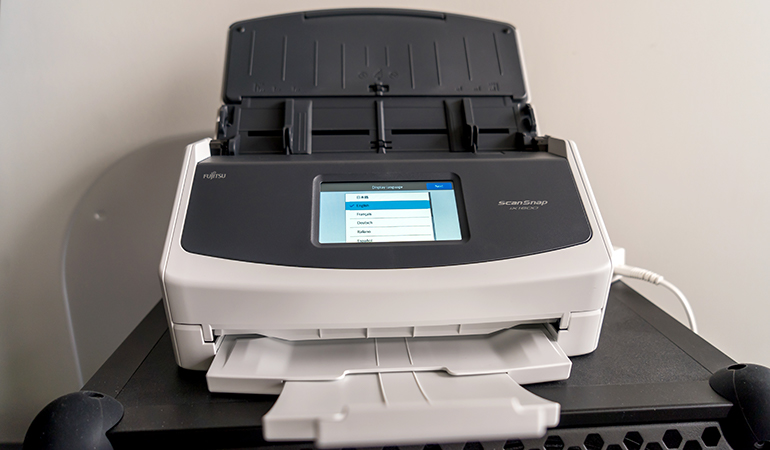
Fast document scanning gets another upgrade from Fujitsu in the form of the ScanSnap iX1600, a desktop model that improves upon an already stellar lineup.
The iX1600 takes over as Fujitsu’s flagship, only is now joined by the ScanSnap iX1400, a more pared-down version that excludes the built-in touchscreen. While that model retains one-touch scanning, losing out on the screen also means all the features associated with it are relegated to the ScanSnap Home software on Windows PC or Mac.
This review focuses on the iX1600, which costs about $160 more, but is ultimately far better value because of the ancillary features coming with it. When both paper volume and speed are necessary to whatever is you do at home or work, this is a scanner designed to handle it all.
Familiar look
Fujitsu did little to change the overall look and feel of the iX1600. Put one next to an iX1500 and they look like twins. As with that model, this one doesn’t have an Ethernet port. You will need to connect this to your Wi-Fi network, or plug into a computer via USB (cable comes included) to get the scans from the device to your computer screen — or the cloud.
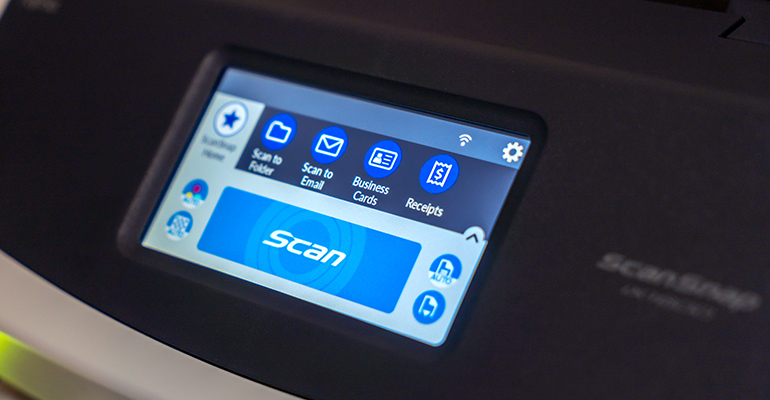
The onboard 4.3-inch touchscreen is back and is the centrepiece of this thing’s whole operation. It’s here that you not only tap the “Scan” button, but also set up the workflows and profiles you need. For example, Fujitsu simplifies how multiple people can scan with it through user profiles. This way, each person’s preferred settings, like which computer to scan to, or which cloud service to save the scan, remain intact.
It’s nice for a work environment, particularly if permissions need to shift based on who’s doing the scanning. But it also applies to the home in a family situation, where a teenager who needs to scan can do so without altering the settings for anyone else, for instance. You can save up to five unique profiles, so there’s plenty of room for others.
The ScanSnap Home software does a lot of heavy lifting, and I’ll touch on that, but the general premise here is that you don’t need to do much to get the output you’re looking for. Lift the flap, put the pages into the feeder, press Scan, and that’s about it. It can handle up to 40 pages per minute up to Best mode (it’s 10ppm in Excellent) in colour at 300dpi or 600dpi in monochrome (1,200dpi in Excellent).

Scanning locally and to the cloud
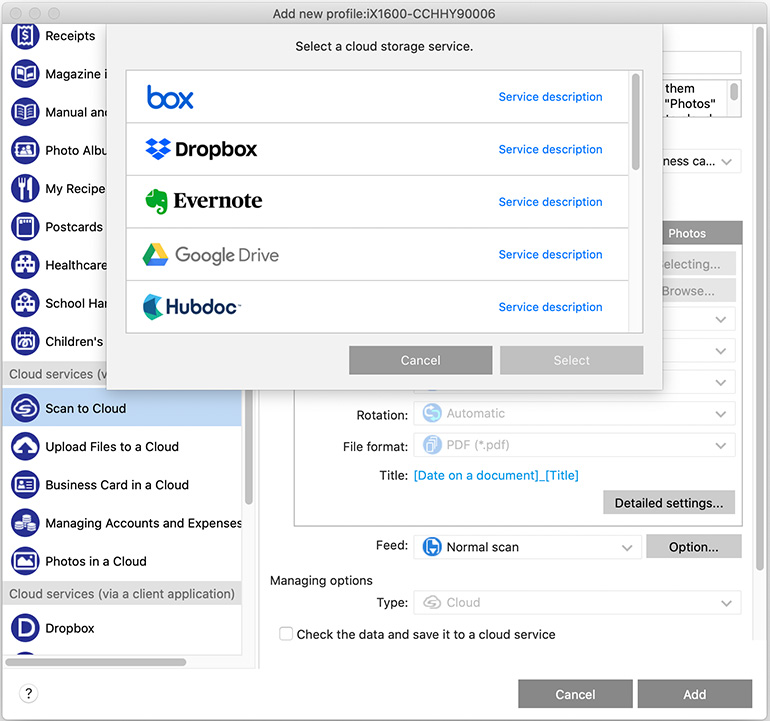
If this is your first foray into ScanSnap scanners, you may not immediately recognize where to add cloud services. You have to do it in the ScanSnap Home software, where going to ScanSnap Home>Scan settings>Scan to cloud is your ticket in. Once there, you can choose from about 13 different services, some of which are known to consumers, others more business-oriented.
Rather than directly scanning to the cloud service, you could also treat the software as a go-between in case you want to see it first, or make adjustments. That’s what the Upload Files to a Cloud section is for. That’s also another reason why you can send scans over to popular apps, like Acrobat, Power PDF or Preview (on a Mac). There are even separate redirects for business cards, receipts and documents folded in half.
That’s why, at least to me, the iX1600 is easy to use off the bat, but takes more time to customize. You can literally set it up and start scanning within 10 minutes, but if you haven’t set up any sort of workflow, you may not get the full breadth of what it’s capable of. Mind you, that’s not a requirement if your needs are more modest, but diving into ScanSnap Home is well worth it to see what kind of setup might work better for you.
Of course, if you’re migrating from one Fujitsu scanner to another, your preferences can theoretically carry over through your account to the new model — albeit manually. That was actually one thing I messed up when initially setting up the iX1600. I made the mistake of deleting the previous iX1500 first, instead of keeping it there as I onboarded the iX1600. It would’ve made the transition more seamless. I could just look at what I had on the previous one and just apply it one at a time to the new one. It’s unfortunate Fujitsu still hasn’t found a way to make this transition feel like little more than a software update, but that’s one of the time-consuming drawbacks here.
Either way, none of that would matter if the scanning quality wasn’t up to snuff. It was hardly surprising that it was, given Fujitsu’s pedigree in that area with the iX lineup. While I can’t really say there’s any sort of dramatic difference in output quality from the iX1500 to the iX1600, I would say that I had fewer issues with the Wi-Fi connection. The previous scanner eventually became erratic when connected wirelessly, whereas this one has been as smooth as it gets that way.

Workflow and maintenance
One thing I like about having a built-in screen is the context it sometimes provides. It’s easy to make quick changes, like in what quality to scan in, or whether it should come in colour or monochrome. But I also liked that putting in larger documents that were folded to make room is easier than ever now.
The ScanSnap Home mobile app for iOS and Android can be just as convenient, especially if you’re scanning something before heading out somewhere. Nothing major changed as to how that works, but it is convenient when you need it.

What I also liked was how the scanner can pinpoint where a problem lies with the glass that might cause streaking. Rather than just a generic message, sensors inside hone in on which part of the glass has the issue. Fujitsu built this to be a workhorse, so it should run for years before it shows any signs of wear and tear.
That matters when you consider the various types of documents you can run through it. Regular paper, glossy brochures, business cards, receipts, invoices, 11 x 17 posters, and on and on. It’s not the best as a photo scanner, at least as it pertains to archiving or enhancing older prints, but any visual item that includes photos will come out looking good.
Moving paper around digitally
The ScanSnap iX1600 is a lot to spend if you’re rarely scanning documents. While it can last for a long time, its real value is in putting it to work regularly. That could mean digitizing a lot of documents over time, or dealing with a regular paper trail. Either way, the goal for going paperless applies, and easy to achieve with a device like this.
It makes more sense when it’s easy to tell the scanned documents where to go. The scanning performance is one thing, but the real benefit comes in the software that facilitates everything after that. Put the two together, and it’s hard to find a document scanning workflow that can do it better right now.


